Addendum

Using the Addendum Feature in Methvin

When clients request changes in your estimate, it’s not practical to manually edit each line item. Instead, Methvin provides a smart Addendum Import tool to help you review, compare, and apply changes efficiently.

Upload the Addendum File

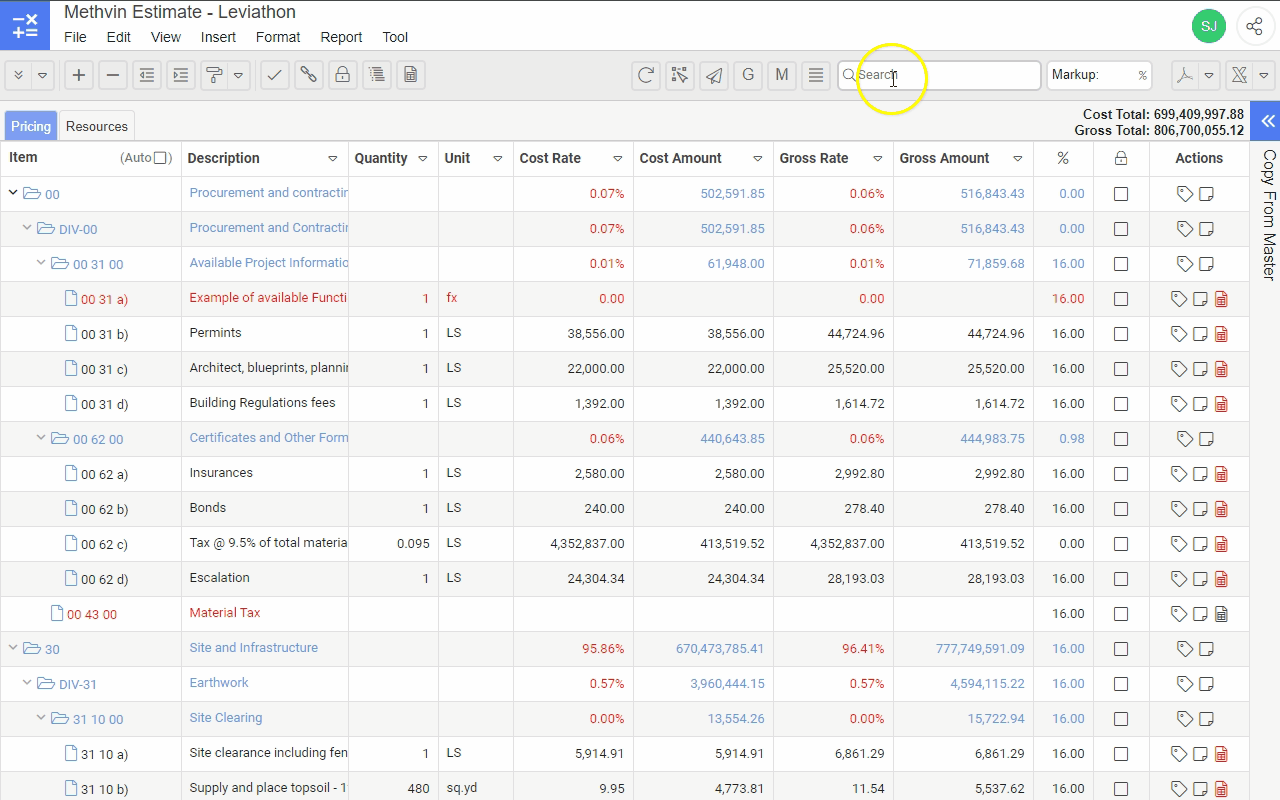
  • Go to the File menu.

  • Select Import Addendum.

  • Choose the addendum file sent by the client and click Import.

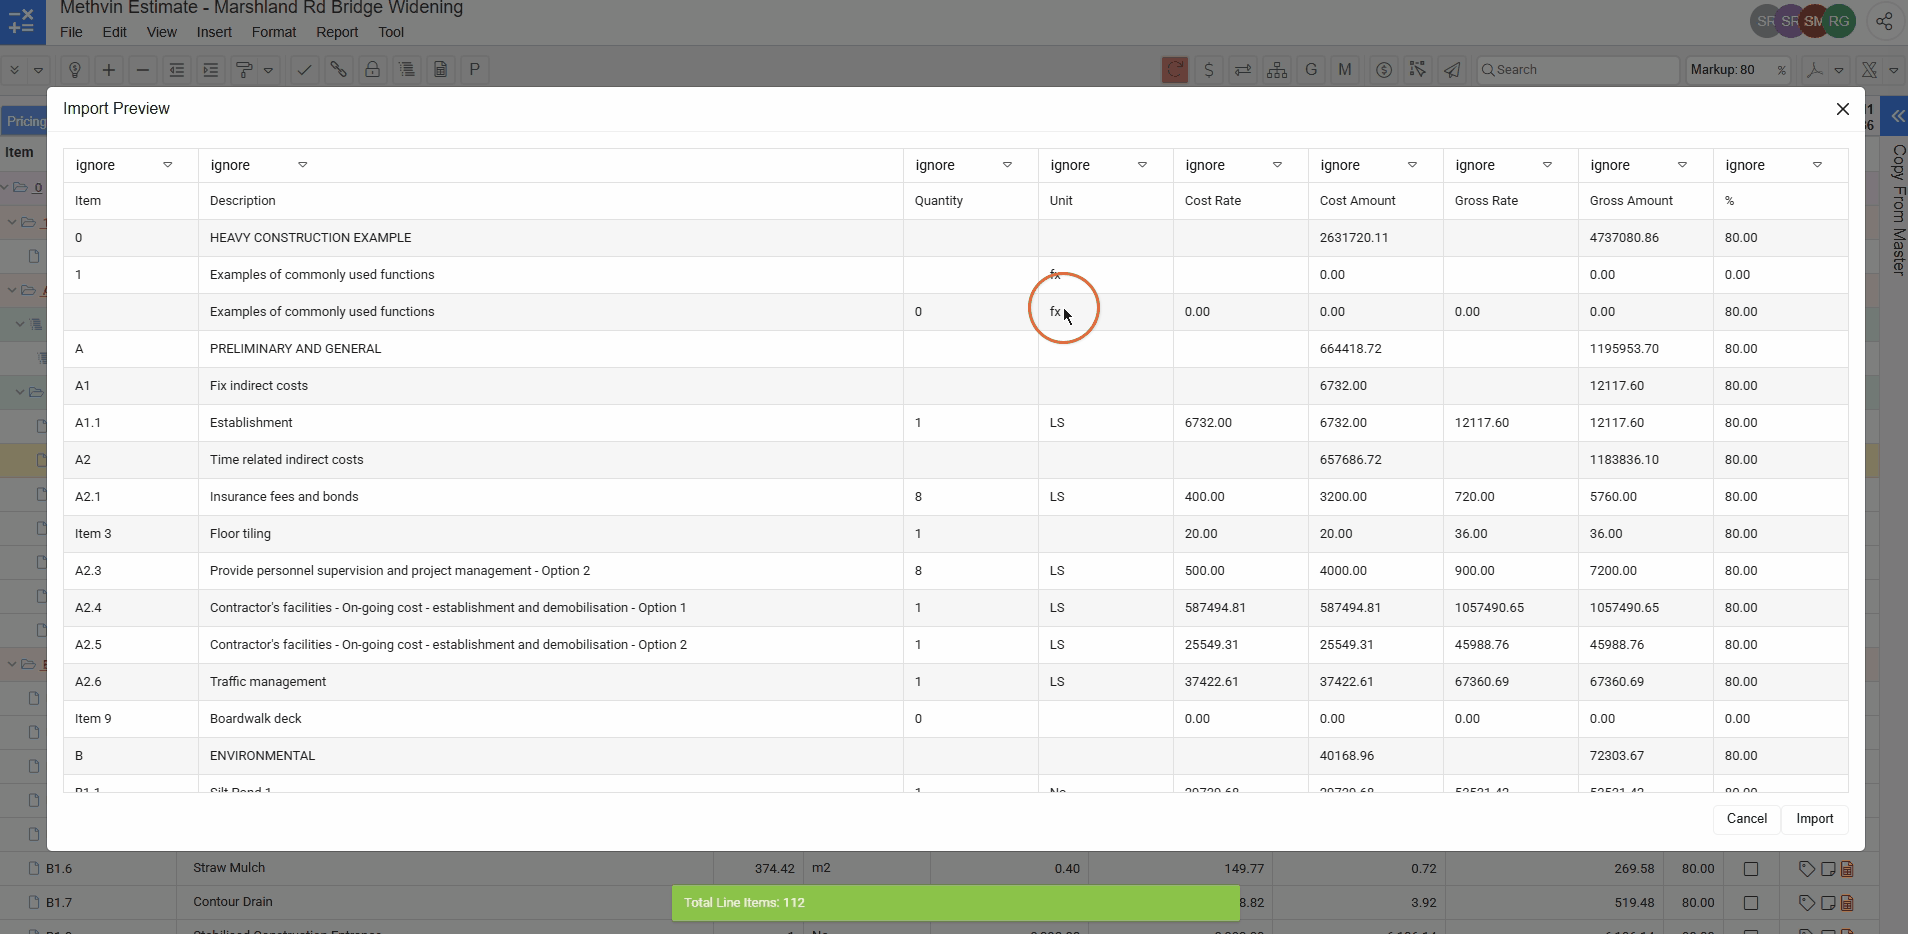
Map the Columns (Import Preview Window)

Once the file loads, you will see the Import Preview Window.

  • Map the relevant columns such as:

    • Item
    • Description
    • Quantity
    • Unit
  • Use the dropdowns labeled ignore to assign the correct mapping.

  • After mapping, click Import.

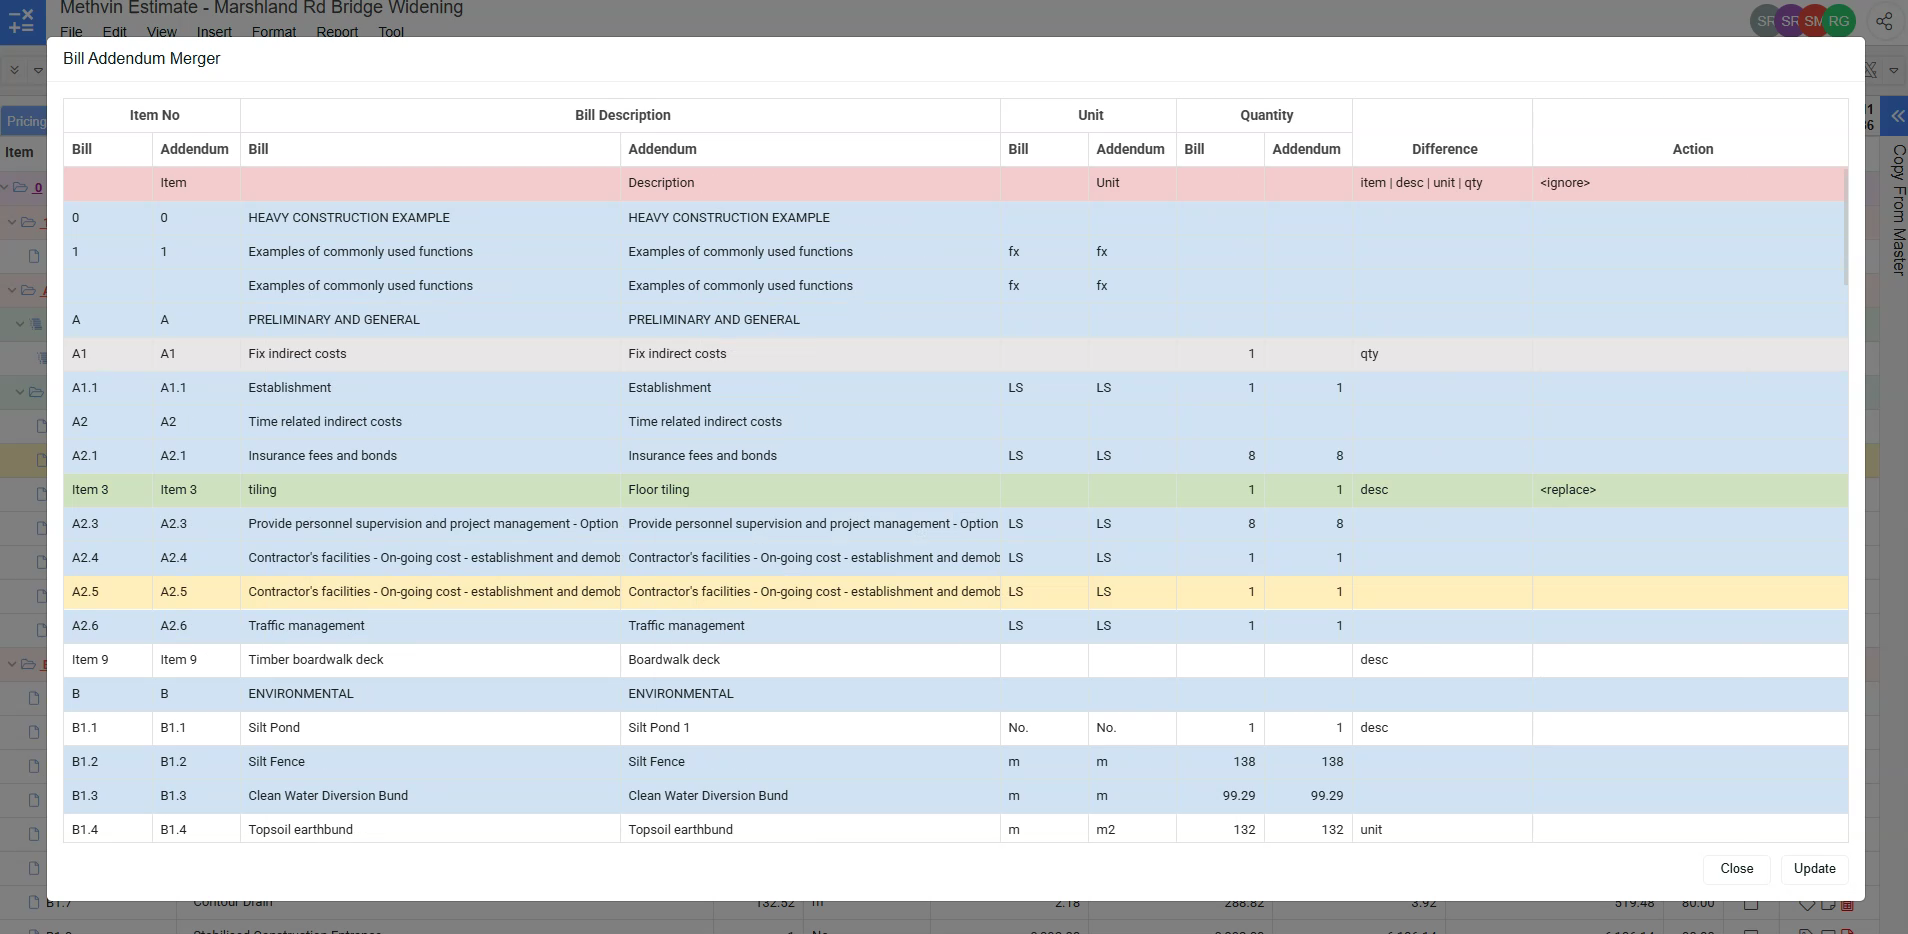
Review and Edit in Bill Addendum Merger

After import, the Bill Addendum Merger window opens.
Here you can:

  1. Compare each line item between the original Bill and the Addendum.
  2. The Difference column shows the following differences between the two,
    • Item number
    • Description
    • Unit
    • Quantity
  3. The Action column logs what actions were taken.

Right-Click Context Menu Options

(Right-click any line item to view these actions)

Option Name Function Shortcut
Insert Addendum Item Inserts the addendum item into the estimate as a new line item.

Ctrl + Insert

Replace Job Item Replaces the existing job item with the one from the addendum.

Enter

Delete Job Item Deletes the original job item.

Ctrl + Delete

Ignore Addendum Item Ignores the addendum version of the line item.

Ctrl + F

Ignore Job Item Ignores the job version of the line item.

Ctrl + G

Undo Reverses the last action you performed.

Ctrl + Z

Compare Description Displays the full description of the selected line item, helpful for long texts.

-

Finalizing the Changes

  • Once you're done reviewing and applying actions, click Update.

  • Then click Close to return to your estimate and see the finalized version.

Getting Started

Create a New Project


Import resources table from master

Import client Schedule of Quantities (SoQ), mapping tool (ctrl+c & ctrl+v)

Project structure(WBS). Use indent and outdent to set section headings

Quick example of estimating a Bill Item


Global Variables

Global Variables

Global variables in the estimate software allow users to define custom parameters that can be applied across multiple sections of a project. These variables can represent values like cost rates, dimensions, or any recurring metric that needs to be referenced in calculations throughout the estimate. Once a global variable is created, it can be easily reused and updated, streamlining your workflow and ensuring consistency across all related calculations.

Create a New Global Variable

  1. On the right side of the toolbar, locate the Global Variable  icon.
  2. Click the icon to open the Global Variable panel.
  3. Click the Add Item + icon from the tool bar or from the right click context menu.
  4. Enter description (e.g., "Labor Rate"), Variable (e.g., "LR_GV"), unit (e.g., per hour, per square meter), equation (e.g., 5days*8hours) and value.

After creating the variable, you can use it in formulas across the estimate by referencing its name (e.g., using LR_GV in a calculation

Delete a Global Variable

  1. To delete a global variable, right-click on the variable in the Global Variable panel and select Delete Task.
  2. Or select the variable and use the Delete Task  option from the toolbar.

Copy from Master

Copy from Master

The "Copy from Master" feature streamlines the development of the schedule of quantities (SoP) by enabling you to import measurements from any existing project into a new one. This feature eliminates the need to create new measurement items, formulas, and pricing worksheets from scratch, ensuring consistency and accelerating the project setup process

Accessing the "Copy from Master" Feature

  1. Access the "Copy from Master" button on the right-hand side of the estimation table.
  2. By clicking this button a side panel will open, where you can manage and import items from previous “Master” projects.

Select any Previous Project as the Master

  1. In the Master panel, click the Settings button located in the top right corner. 
  2. Upon clicking the button, a dialog box will appear, allowing you to browse through a list of saved projects.
  3. Select the project that contains the items you want to copy. This project serves as your "Master" from which you will import data.

Importing items from the existing project

  1. After selecting a project, the items available for import will be displayed. These can include bill items, resources, rates, and more.
  2. To import these into your new project, simply drag and drop the desired items into the schedule of quantities (SoP) list.
  3. Select multiple items to drag and drop into the schedule of quantities (SoP) list. 

You can make any necessary adjustments to the imported items and worksheets, such as modifying formulas or pricing to fit the new project’s requirements.

Copy a bill item or worksheet from master

  1. Bill: Copy from master 
  2. Worksheet: Copy from master and resource
  3. Resource: Copy from master

Access worksheet

You can access the worksheet by clicking on the worksheet icon in the Actions column. Which will open the worksheet tab.

Benefits of Using Copy From Master

  • Consistency Across Projects: Use this feature to maintain consistency in pricing, resources, and other data across multiple projects.
  • Efficient Workflow: Take advantage of this feature when managing repetitive tasks or standard items that are commonly used across different projects.
  • Estimating Accuracy: During the copy from master the Imported Bill Items worksheets are copied in too, ensuring consistency between the schedule of quantities and the estimate.

Currency Settings

Currency Settings

Methvin provides comprehensive currency management for both projects and individual resources. Users can select between project and local currencies, adjust exchange rates, and specify different currencies for resources. This ensures accurate cost tracking and flexibility across various currency systems.

Set Project Currency

To set the project and local currencies,

  1. Access Currency Settings in the tool menu and select Project Currency  from the drop down.
  2. This will open a popup window where you can set the project and local currency.

Set Resource Currency

To set currency of individual resource,

  1. Select Resource Currency from the Currency Settings menu or by clicking on the Resource currency icon  in the toolbar.
  2. Upon selection, additional columns of base rate, base currency, exchange rate and lock currency will appear for each resource in front of it.
  3. Use the Base Currency dropdown to change the currency of any resource as required.

Locking Resource Currency

Once you’ve set the currency for a resource, you can lock it by checking the Lock Currency column. This ensures that the currency rate remains fixed, even if the overall exchange rates are updated.

Update Exchange Rates

To refresh exchange rates, click Update Exchange Rate  from the Currency Settings menu or the tool bar. This will update the rates for all unlocked resources, ensuring that the project reflects the most current currency values.

support@methvin.org

+64 27 702 1701