Wall Area Measurement Tool
The Wall Area Measurement Tool allows you to accurately measure the vertical area of walls, taking into account their heights. This feature is especially useful in construction and renovation projects where precise wall area calculations are necessary for material estimation and cost planning. This tool is essential for tasks such as estimating materials for wall surfaces, including paint, wallpaper, or cladding. The tool can be accessed via the quick launch menu or the bill of quantities table. Follow these steps to effectively use the Wall Area Measurement Tool.
Adding a Wall Area Measurement
- Via Bill of Quantities Table
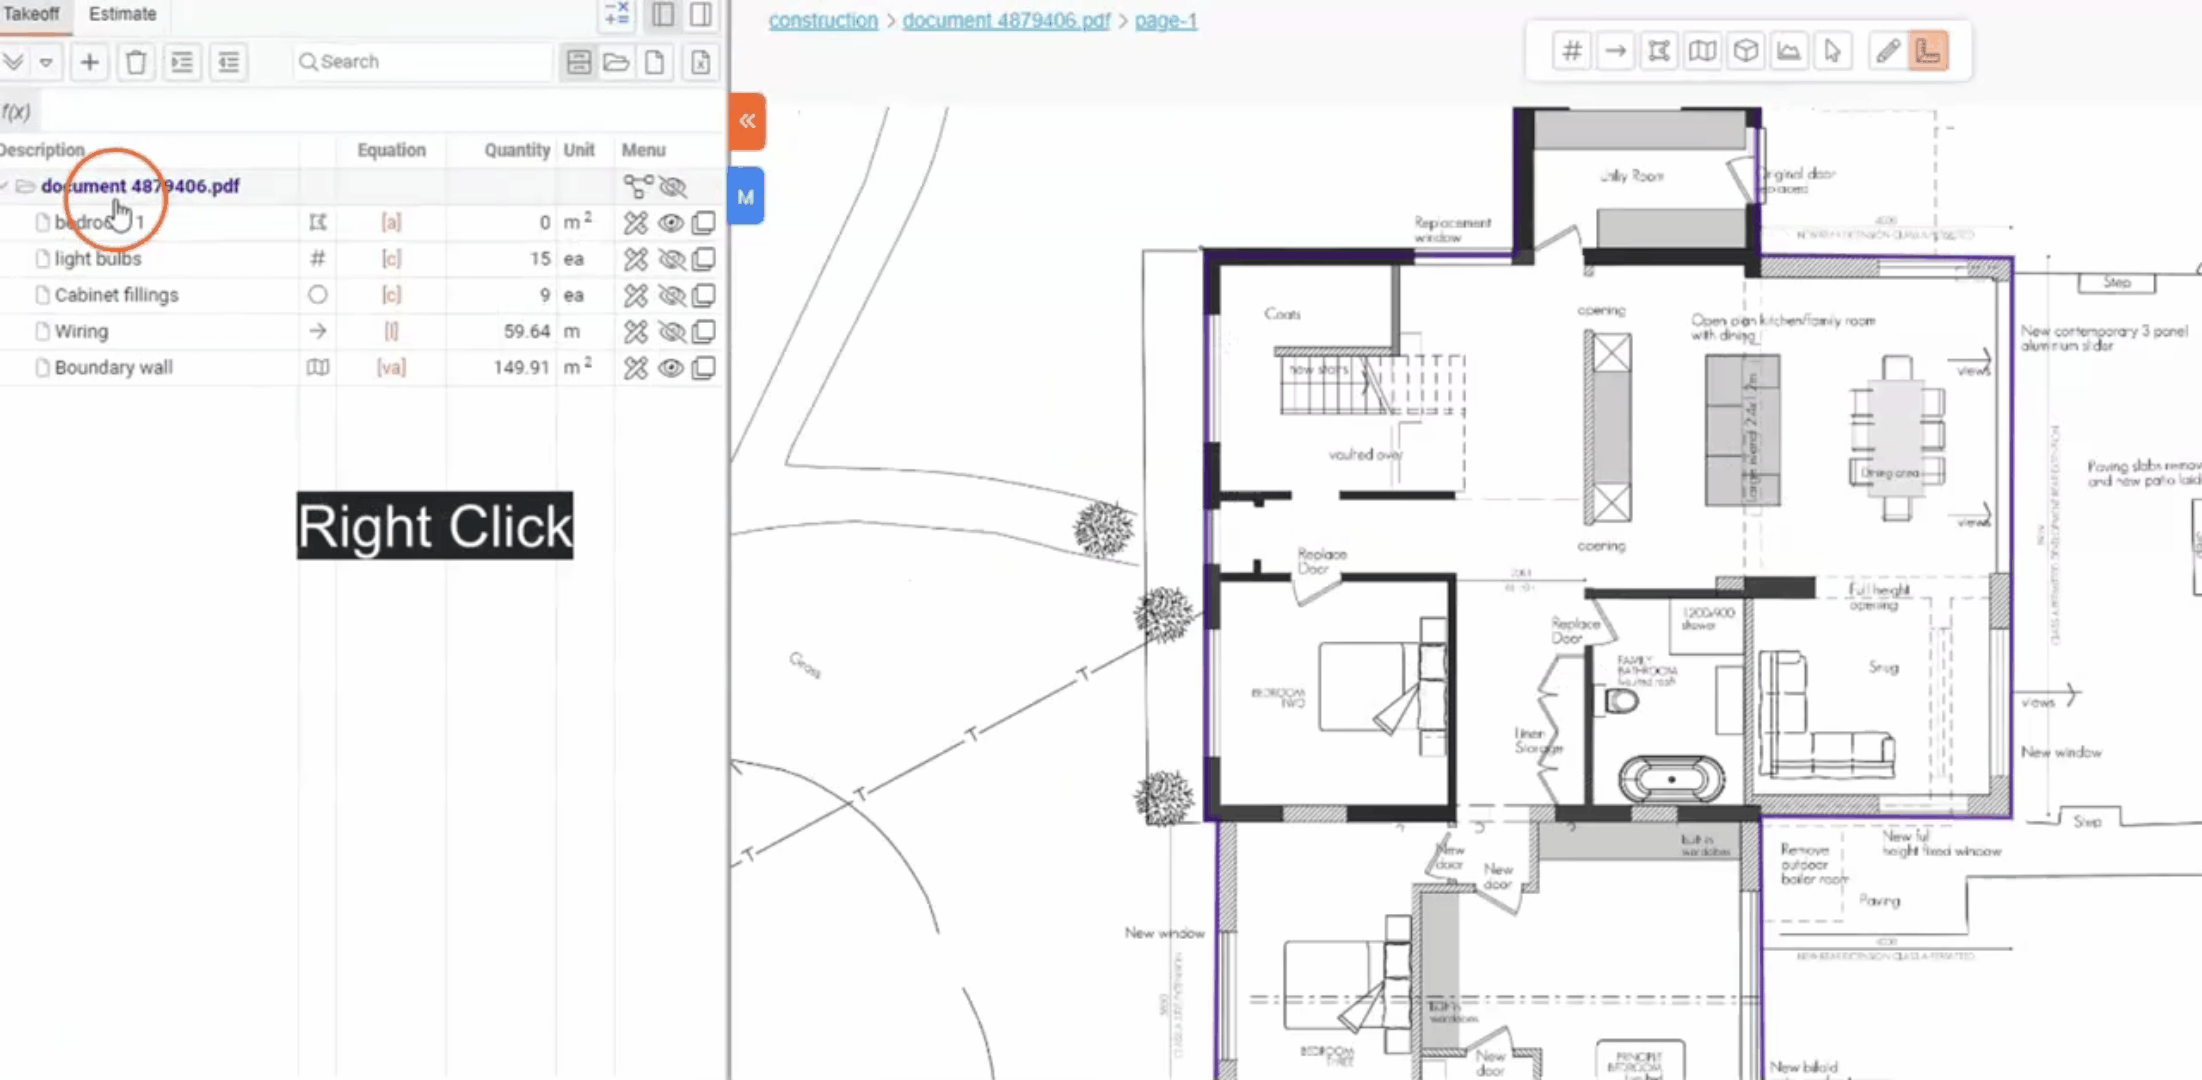
- Right-click in the bill of quantities table and select "New Task."
- Click the "Link Drawing +" icon and choose "Wall Area measurement
 ".
". - Complete the required details (i.e height of the wall in meters) and click "Save."
Performing a Wall Area Measurement
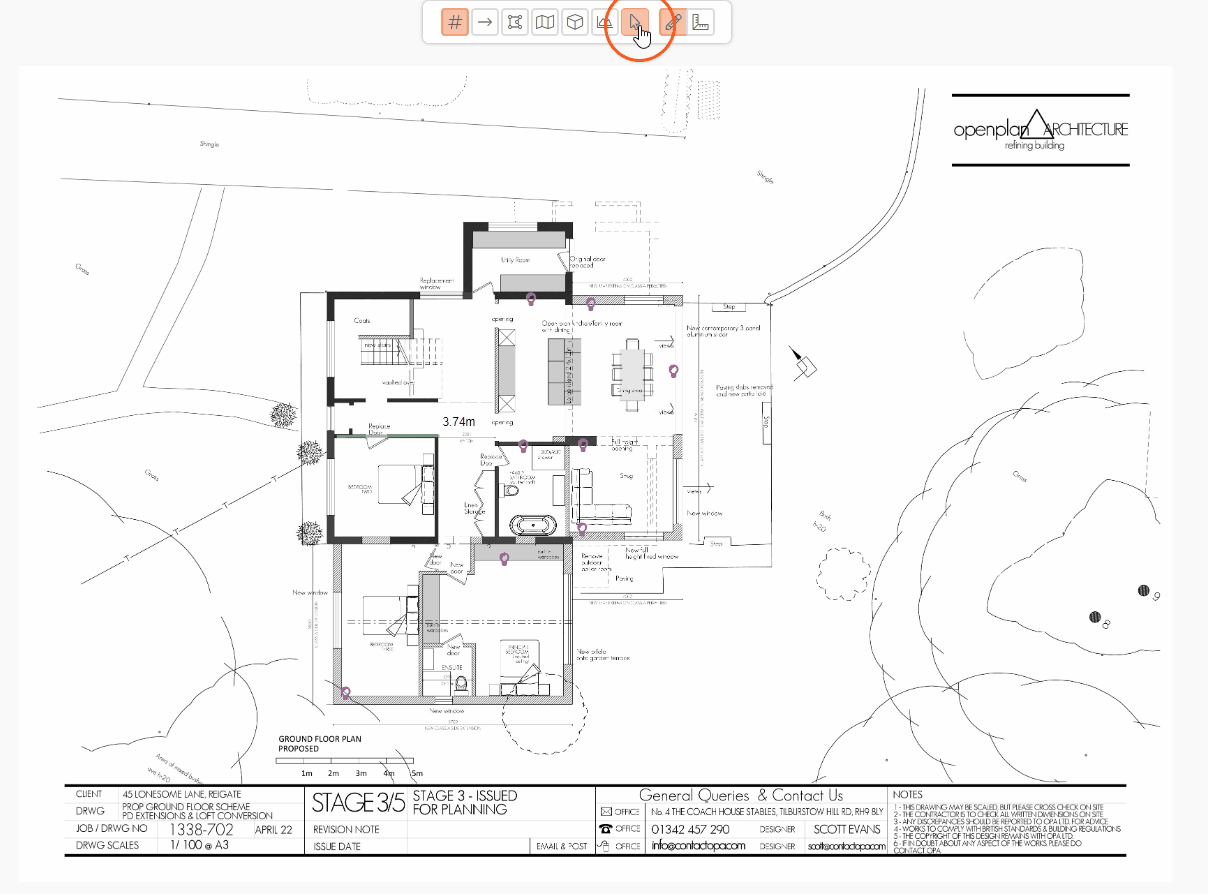
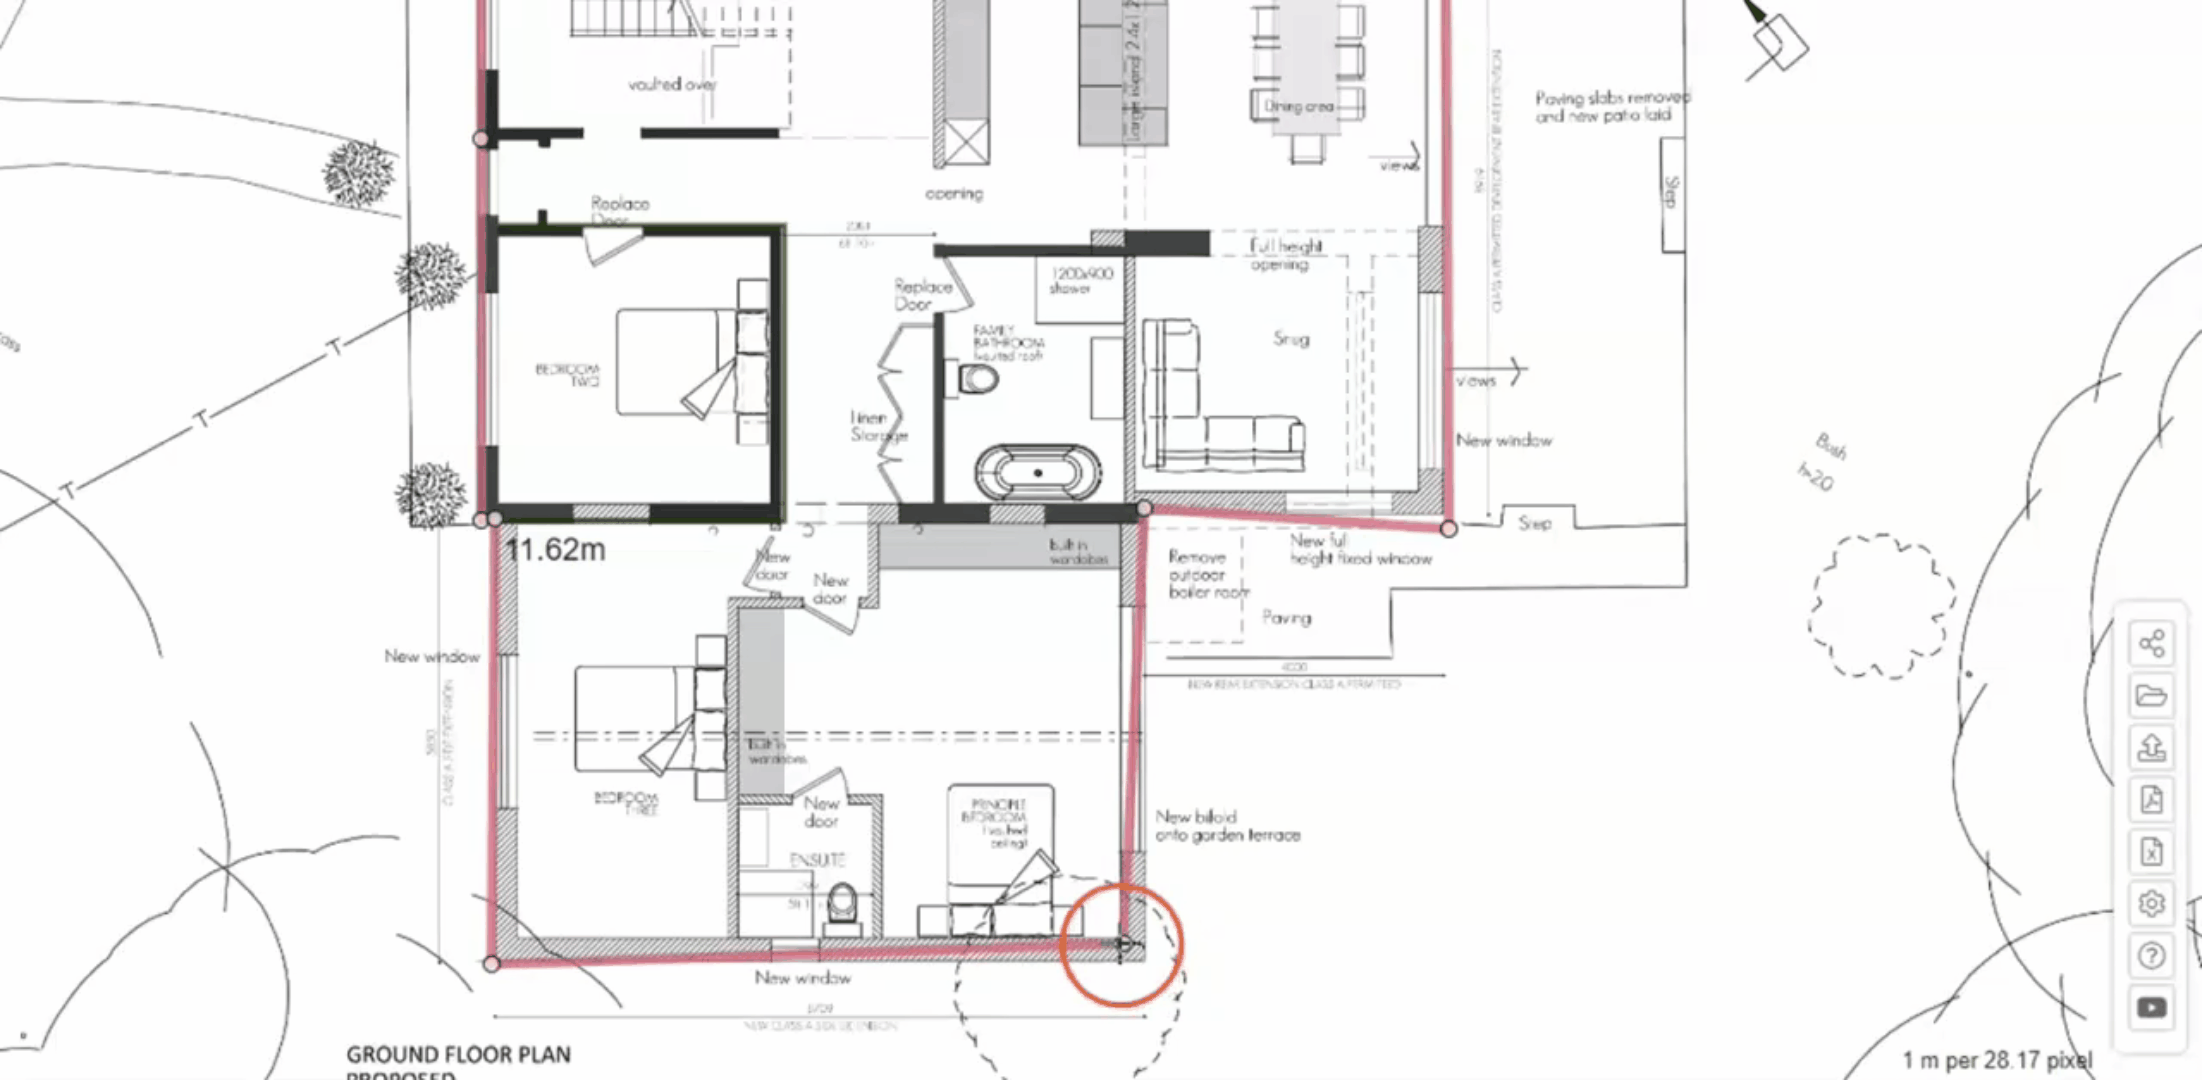
- Click where you want the Wall Area takeoff to begin. This establishes the first Point, which is the starting point of the takeoff item.
- Move to the next Point and click again. A line will appear between the two points while performing the measure. To undo the placement of a Point, press CTRL / Command⌘ and press Z.
- Move to the third Point and click, continuing this process.
- To close out this wall area measure, double-click your last point.
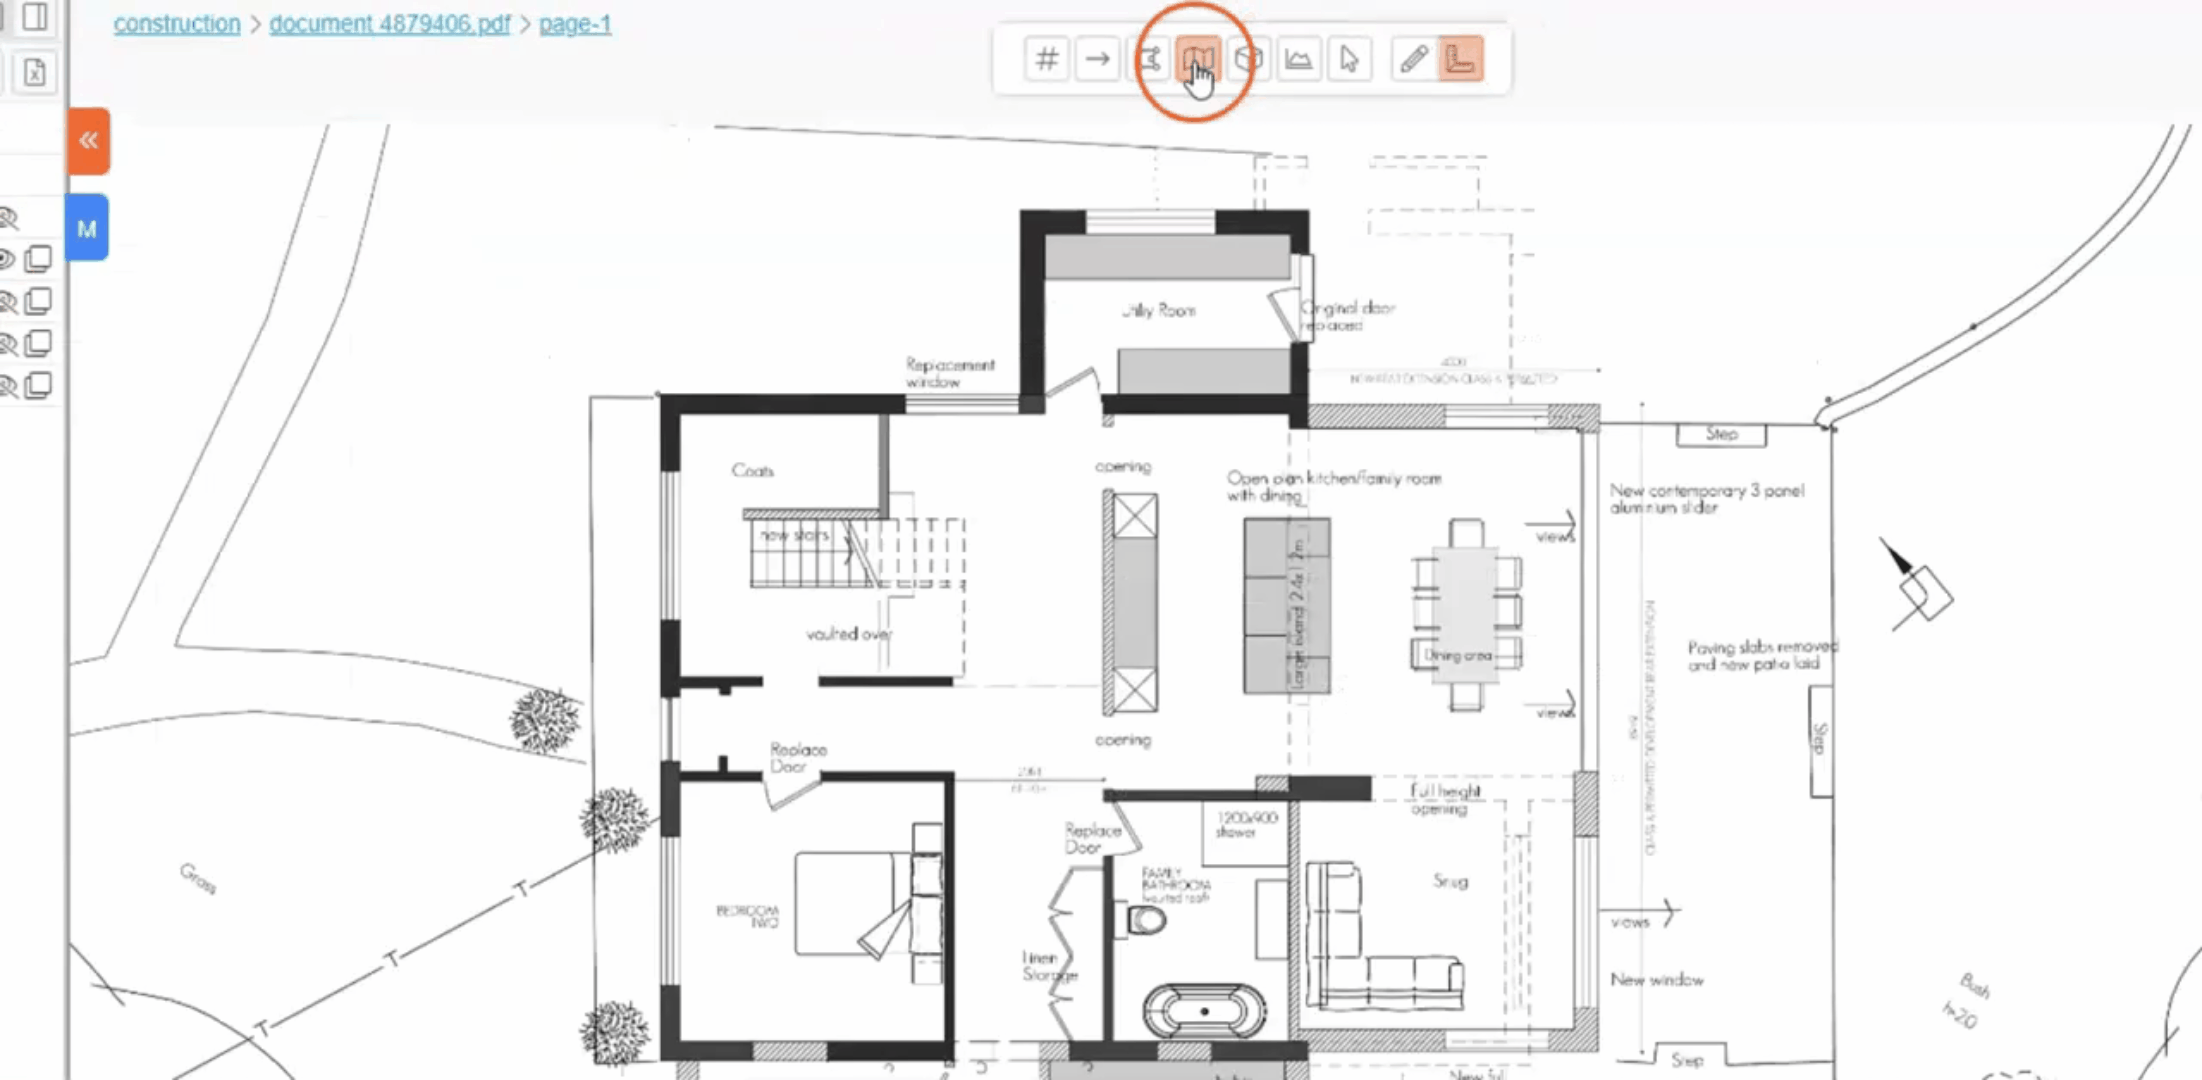
- Via the Quick Launch Menu
- Access the top quick launch menu and select the "Wall Area measurement " icon.
- Complete the required details (i.e height of the wall in meters) and click "Save."
- This action will create a new wall area measure in the bill of quantities table, listed as a child item under the drawing name/description parent.
- Click on the plan to begin a new Wall Area measure.
Plan Navigation Hints
- Click, hold, and drag to pan around the plan.
- Use the mouse scroll wheel to zoom in and out for greater accuracy.
Editing Your Wall Area Measure
- To edit a Wall area measure, hold the CTRL key down while hovering over the element. The edit points will appear and can be dragged to their new locations.
Editing the Wall Area Measurement
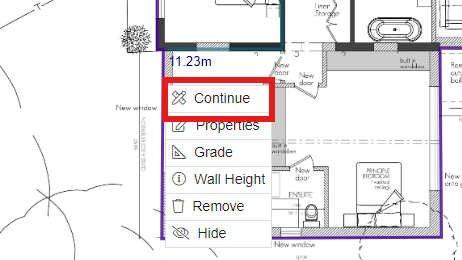
- Right-click an element to open the context menu with options to:
- Continue
- Access Properties
- Change color
- Adjust opaqueness
- Set line width
- Change line style
- Display quantity text
- Grade
- Wall height
- Remove
- Hide
Continuing with a Previous Measure
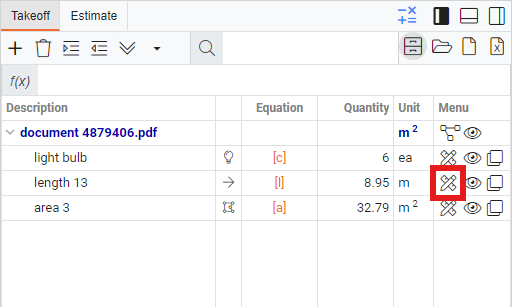
- At any time, you can continue with a previous measure by selecting the "
 " icon from the bill of quantities table.
 - Click to place a Wall on the plan.
OR
- You can continue with the measure by Right clicking on element to open a context menu with option to "Continue".
Adjusting Wall Totals
- You can adjust measurement totals using the equation field. Measurements can be manipulated with Excel-type formulas. For example, multiplying the Walls by a set number [va]*6 will multiply the total vertical area by 6. This may require you to edit the measurements unit of measure to volume.
- The formula follows the PMDAS rule: Parentheses (brackets) first, followed by multiplication, division, addition, then subtraction.
- Detailed information and examples on using formulas are provided in the article "Using Formulas." Refer to the Industry Articles for specific examples in construction, electrical, landscaping, painting, plastering/insulation, plumbing, and roofing.